Insecure session
What we will build
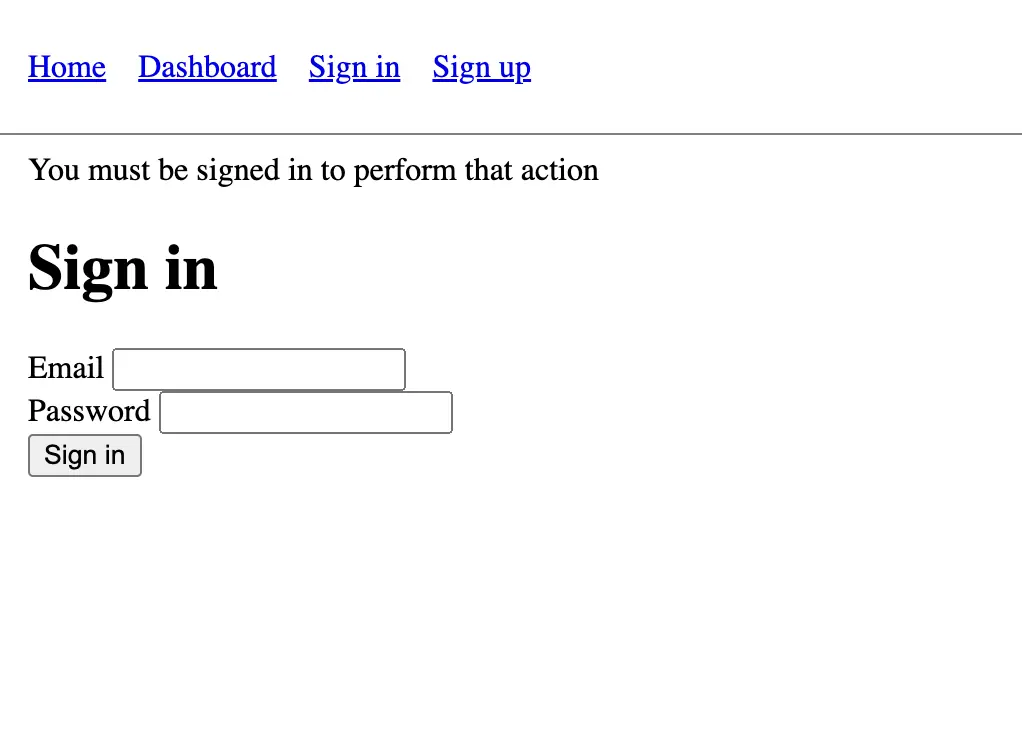
Now that our users are able to register, we need to allow them to sign in. If unauthenticated users try to access the private dashboard page, they will be redirected to the sign-in page and shown an error flash message.

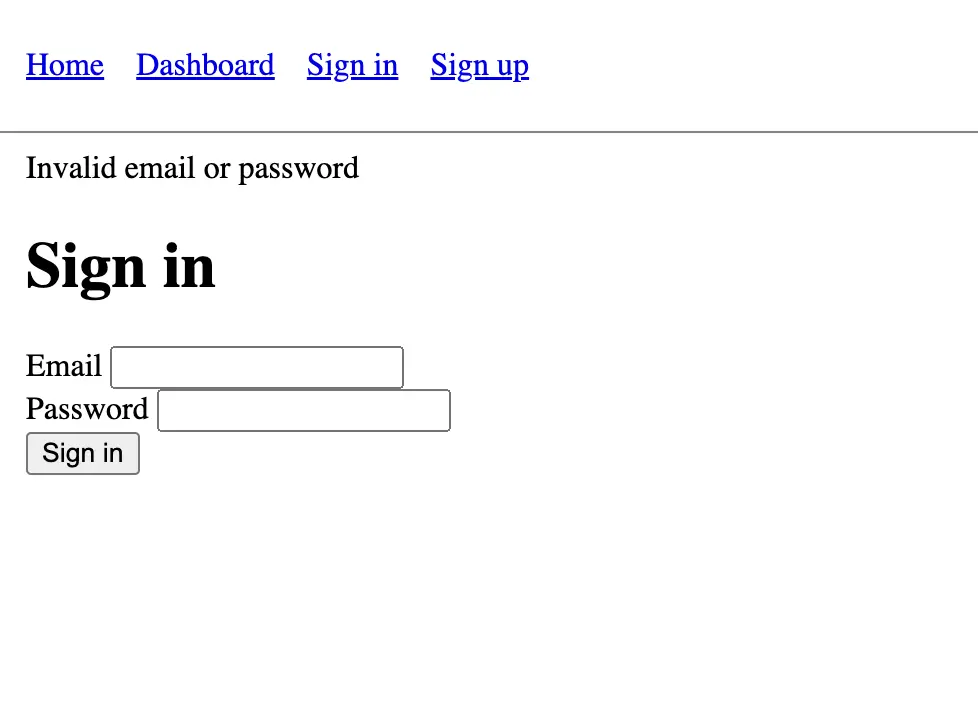
If they then enter an invalid user/password combination, the sign-in form will be re-rendered with an error message:

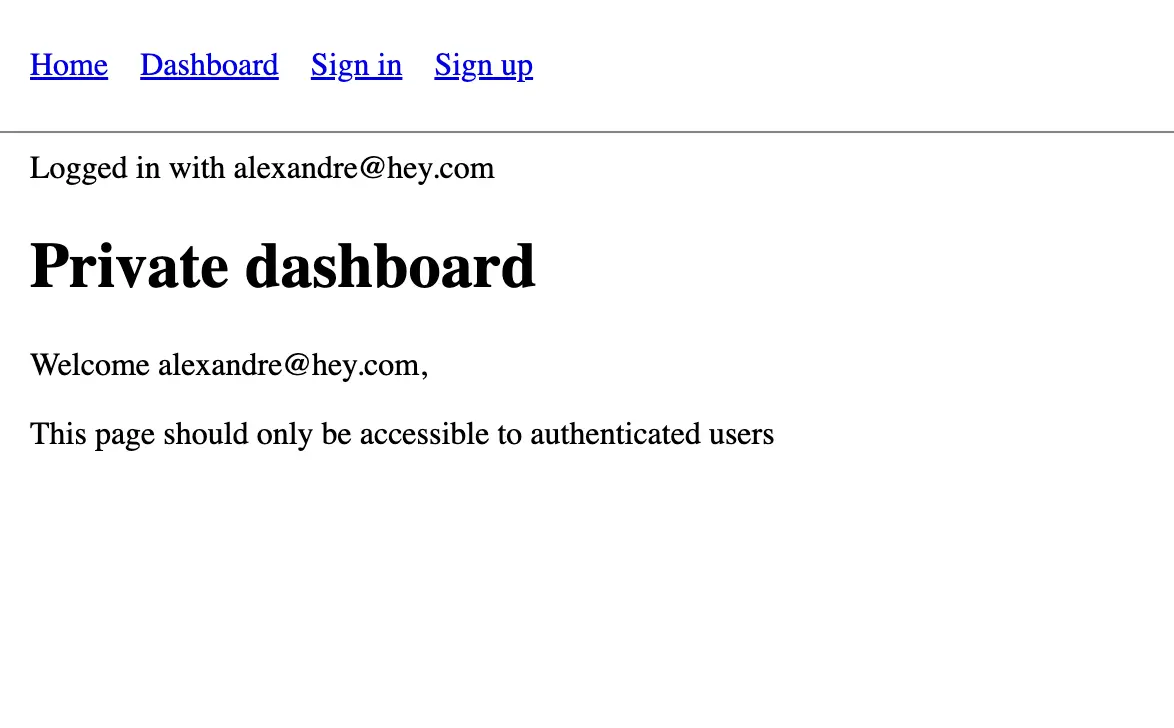
Finally, if they enter a valid user/password combination, they will be redirected to the dashboard page with a success flash message:

Now that we have a clear idea of what we will build in this lesson, it's time to start coding!
Preparing sign-in
The first step is to add a new route in our routes file in order to display the sign-in form:
# config/routes.rb

Rails.application.routes.draw do
  # All the previous routes
  resource :session, only: %i[new create]
end
Once again, we use the singular resource method for our sessions. This is because users will only have one session at a time. Another reason is that we will also add a destroy action later to allow users to sign out. With singular resources, the routes will look like this:
Prefix      Verb   URI Pattern            Controller#Action
new_session GET    /session/new(.:format) sessions#new
session     DELETE /session(.:format)     sessions#destroy
            POST   /session(.:format)     sessions#create
If we didn't use a singular resource, the routes would look like this:
Prefix      Verb   URI Pattern             Controller#Action
sessions    POST   /sessions(.:format)     sessions#create
new_session GET    /sessions/new(.:format) sessions#new
session     DELETE /sessions/:id(.:format) sessions#destroy
The main difference here is that singular resources don't have an :id parameter in the URI pattern. This is what we want because, as we'll see later, we will store the session_id in a cookie, so it's unnecessary to also have it in the URL to sign out.
Let's now focus on the #new and #create actions in order to allow our users to sign in. Later, we will implement the #destroy action to allow them to sign out.
Now that our routes are ready, it's time to create the corresponding controller:
# app/controllers/sessions_controller.rb

class SessionsController < ApplicationController
  def new
  end

  def create
    if user = User.authenticate_by(session_params)
      # Add sign-in logic later
      redirect_to dashboard_path, notice: "Logged in with #{user.email}"
    else
      flash.now[:notice] = "Invalid email or password"
      render :new, status: :unprocessable_entity
    end
  end

  private

  def session_params
    params.require(:session).permit(:email, :password)
  end
end
The #new action is just here to allow us to display the sign-in form.
The #create action is much more interesting. We use the authenticate_by method provided by Rails. Under the hood, this method tries to find a user in the database using the email address from the params. If no user is found, it returns nil. If it finds a user, it hashes the password provided in the params with bcrypt and compares it with the password_digest value in the database. If the hashes are equal, it returns the User instance. If the hashes are different, it returns nil:
# Example of the authenticate_by method:

User.create! email: "[email protected]", password: "password"

User.authenticate_by email: "[email protected]", password: "password"
# => nil
User.authenticate_by email: "[email protected]", password: "wrongpassword"
# => nil
User.authenticate_by email: "[email protected]", password: "password"
# => #<User email: "[email protected]"...>
We will go back to the actual sign-in logic later. For now, we just redirect the user to the dashboard if a valid email/password combination is provided by a user, and we display an error message otherwise.
Let's add a view for our sign-in form:
<%# app/views/sessions/new.html.erb %>

<h1>Sign in</h1>

<%= form_with scope: :session, url: session_path do |f| %>
  <div>
    <%= f.label :email %>
    <%= f.email_field :email %>
  </div>

  <div>
    <%= f.label :password %>
    <%= f.password_field :password %>
  </div>

  <%= f.submit "Sign in" %>
<% end %>
The only surprising thing here might be the scope: :session option in the form_with method. It allows us to nest our email and password params in a session key like this:
{ session: { email: "[email protected]", password: "password" } }
Then in the controller, we can access the params like this:
def session_params
  params.require(:session).permit(:email, :password)
end
While this scope option is completely optional, I like to use it because it makes the params in the controller more explicit, but it's only a matter of personal preference.
In order to make the application usable by our users, we should now add a link to the sign-in form in the navbar:
<%# app/views/layouts/application.html.erb %>

<!DOCTYPE html>
<html>
  <head>
    <%# ... %>
  </head>
  <body>
    <header>
      <nav>
        <ul>
          <li><%= link_to "Home", root_path %></li>
          <li><%= link_to "Dashboard", dashboard_path %></li>
          <li><%= link_to "Sign in", new_session_path %></li>
          <li><%= link_to "Sign up", new_registration_path %></li>
        </ul>
      </nav>
    </header>
    <main>
      <%# ... %>
    </main>
  </body>
</html>
Finally, we can test our sign-in form. If we try to sign in with an invalid email/password combination, we should see an error flash message. If we sign in with a valid email/password combination, we should be redirected to the dashboard with a success message.
With all this in place, we are now ready to implement the actual sign-in logic.
Authentication concern
The first version that we are going to code together will have huge security vulnerabilities. The goal is to learn how to recognize and fix them. We will remove them one by one until we have a system that is suitable for a real production application.
Let's start working on our first authentication version. Let's open the SessionsController and update the #create action:
# app/controllers/sessions_controller.rb

def create
  if user = User.authenticate_by(session_params)
    sign_in user
    redirect_to dashboard_path, notice: "Logged in with #{user.email}"
  else
    flash.now[:notice] = "Invalid email or password"
    render :new, status: :unprocessable_entity
  end
end
In the snippet above, we call a sign_in method that we haven't defined yet. This method has to live somewhere. In order to keep our code nice and tidy, we are going to use a Rails concern.
A Rails concern is simply a module that we can use to share/organize pieces of code. In our case, let's create a new concern called Authentication that we'll use to code all authentication-related methods:
# app/controllers/concerns/authentication.rb

module Authentication
  def sign_in(user)
    # TODO: Implement sign-in logic
  end
end
We can now include this concern in ApplicationController:
# app/controllers/application_controller.rb

class ApplicationController < ActionController::Base
  include Authentication
end
As our SessionsController inherits from ApplicationController, it will have access to the sign_in method.
By adding this concern, we created a place where all authentication-related code can live. Grouping pieces of code that belong together like this will make our lives easier once our application grows by making it easier to find what we are looking for.
Let's now implement a very insecure sign-in method:
# app/controllers/concerns/authentication.rb

module Authentication
  def sign_in(user)
    # Warning: This is not the final implementation and is currently insecure
    cookies.permanent[:user_id] = user.id
  end
end
Once a user successfully authenticates with a valid email/password combination, we can store their id in the cookies thanks to Rails' cookies method. The permanent method means storing the cookie for the next 20 years in the user's browser.
Once the cookie is stored in the user's browser, it will be sent in the headers of every request made to our server unless it's cleared by the user, or, as we'll see later, by our Rails application in the sign_out action. This means that once signed in, whenever the user makes a request to our application, we can access the user's id in the cookies and use it to find the user in the database.
Let's use this feature to force authentication before accessing the dashboard. The first step is to add a before_action in the DashboardsController:
# app/controllers/dashboards_controller.rb

class DashboardsController < ApplicationController
  before_action :require_authentication

  def show
  end
end
We can implement the require_authentication method in the Authentication concern:
# app/controllers/concerns/authentication.rb

module Authentication
  def require_authentication
    restore_authentication || request_authentication
  end

  def restore_authentication
    User.find_by(id: cookies[:user_id])
  end

  def request_authentication
    redirect_to new_session_path, notice: "You must be signed in to perform that action"
  end

  # All the previous code
end
The require_authentication method first tries to find a user by the id stored in the cookies. As we saw earlier, when a user signs in, we store their id in the cookies. The cookies are then sent to the server with every request until they log out or the cookies are cleared, and we can access this value in Rails with cookies[:user_id].
If such a user is found, the method returns the user object, which is a truthy value, and the before_action filter will let the request go through. If no user is found, the method redirects the user to the sign-in page.
You can now try to access the dashboard page in a new private window. You should be redirected to the sign-in page with a message saying "You must be signed in to perform that action".
Accessing the current user
While the require_authentication action above works fine to prevent unauthenticated users from accessing the dashboard, it would be nice to display the user's email address in the dashboard view.
Let's improve the require_authentication method to store the user object in a global variable:
# app/controllers/concerns/authentication.rb

module Authentication
  # All the previous code

  def restore_authentication
    Current.user = User.find_by(id: cookies[:user_id])
  end

  # All the previous code
end
The Current object is a simple class that we can use to store global variables in Ruby on Rails. To make it work, we need to define the Current class in the models and make it inherit from ActiveSupport::CurrentAttributes:
# app/models/current.rb

class Current < ActiveSupport::CurrentAttributes
  attribute :user
end
Before accessing the dashboard, if a user is signed in, we now store the corresponding user object in Current.user. This means we can now access this User instance in the controllers, the models, and the views. Let's add the user's email address to the dashboard view:
<%# app/views/dashboards/show.html.erb %>

<h1>
  Private dashboard
</h1>
<p>
  Welcome <%= Current.user.email %>,
</p>
<p>
  This page should only be accessible to authenticated users
</p>
If you now sign in a user with a valid email/password combination, you should be redirected to the dashboard and see a welcome message with the user's email address.
That was quite a lot of code. We have a first "working" version of our authentication system. However, it has a lot of security vulnerabilities. We'll discuss them and see how we can fix them later in the course.
Signing in on sign-up
There is one small user experience improvement we can make before discussing the security vulnerabilities: we should sign in our users right after they create their account. This way, they don't have to sign in manually right after signing up which would be a bit cumbersome.
If you remember well, we added the sign_in method in the Authentication concern. This concern is then included in ApplicationController. Since our RegistrationsController inherits from ApplicationController, it already has access to the sign_in method. We can simply reuse it to sign in our users when they register:
# app/controllers/registrations_controller.rb

# All the previous code
def create
  @user = User.new(user_params)

  if @user.save
    sign_in @user
    redirect_to dashboard_path, notice: "You have successfully registered!"
  else
    render :new, status: :unprocessable_entity
  end
end
# All the previous code
Well, that was easy thanks to how we organized the code! Let's test in the browser and sign up with a new user. We should be redirected to the dashboard right after registering and we should see the welcome message with the user's email address.
In the next chapter, we'll discuss the security vulnerabilities of our current implementation and see how we can fix them.